Menu ki typing AI se karwao — aap sirf check karo.
The menu is the one genuinely long job in setting up a register — two hundred dishes is an afternoon of typing or ten minutes of checking. EasyKOT reads your existing menu from photos, a PDF or a spreadsheet into a review grid; you correct what needs correcting, press import, and the till is selling it. Here is the whole path, stock-outs included.
The wider menu tooling — categories, pricing, images — lives on the menu management page.
Photo ya PDF se register tak — chaar steps.
Pick your lane — import, library, or sample
The dashboard's menu setup opens with three honest doors. Have a menu already? 'Import what you have' takes photos, a PDF, a spreadsheet. Starting fresh? 'Build from our menu' offers a 245-dish Indian library to tick dishes from. Just exploring? Install the sample menu, poke at it, remove it later. Nothing locks you in — every lane ends at the same editable menu.
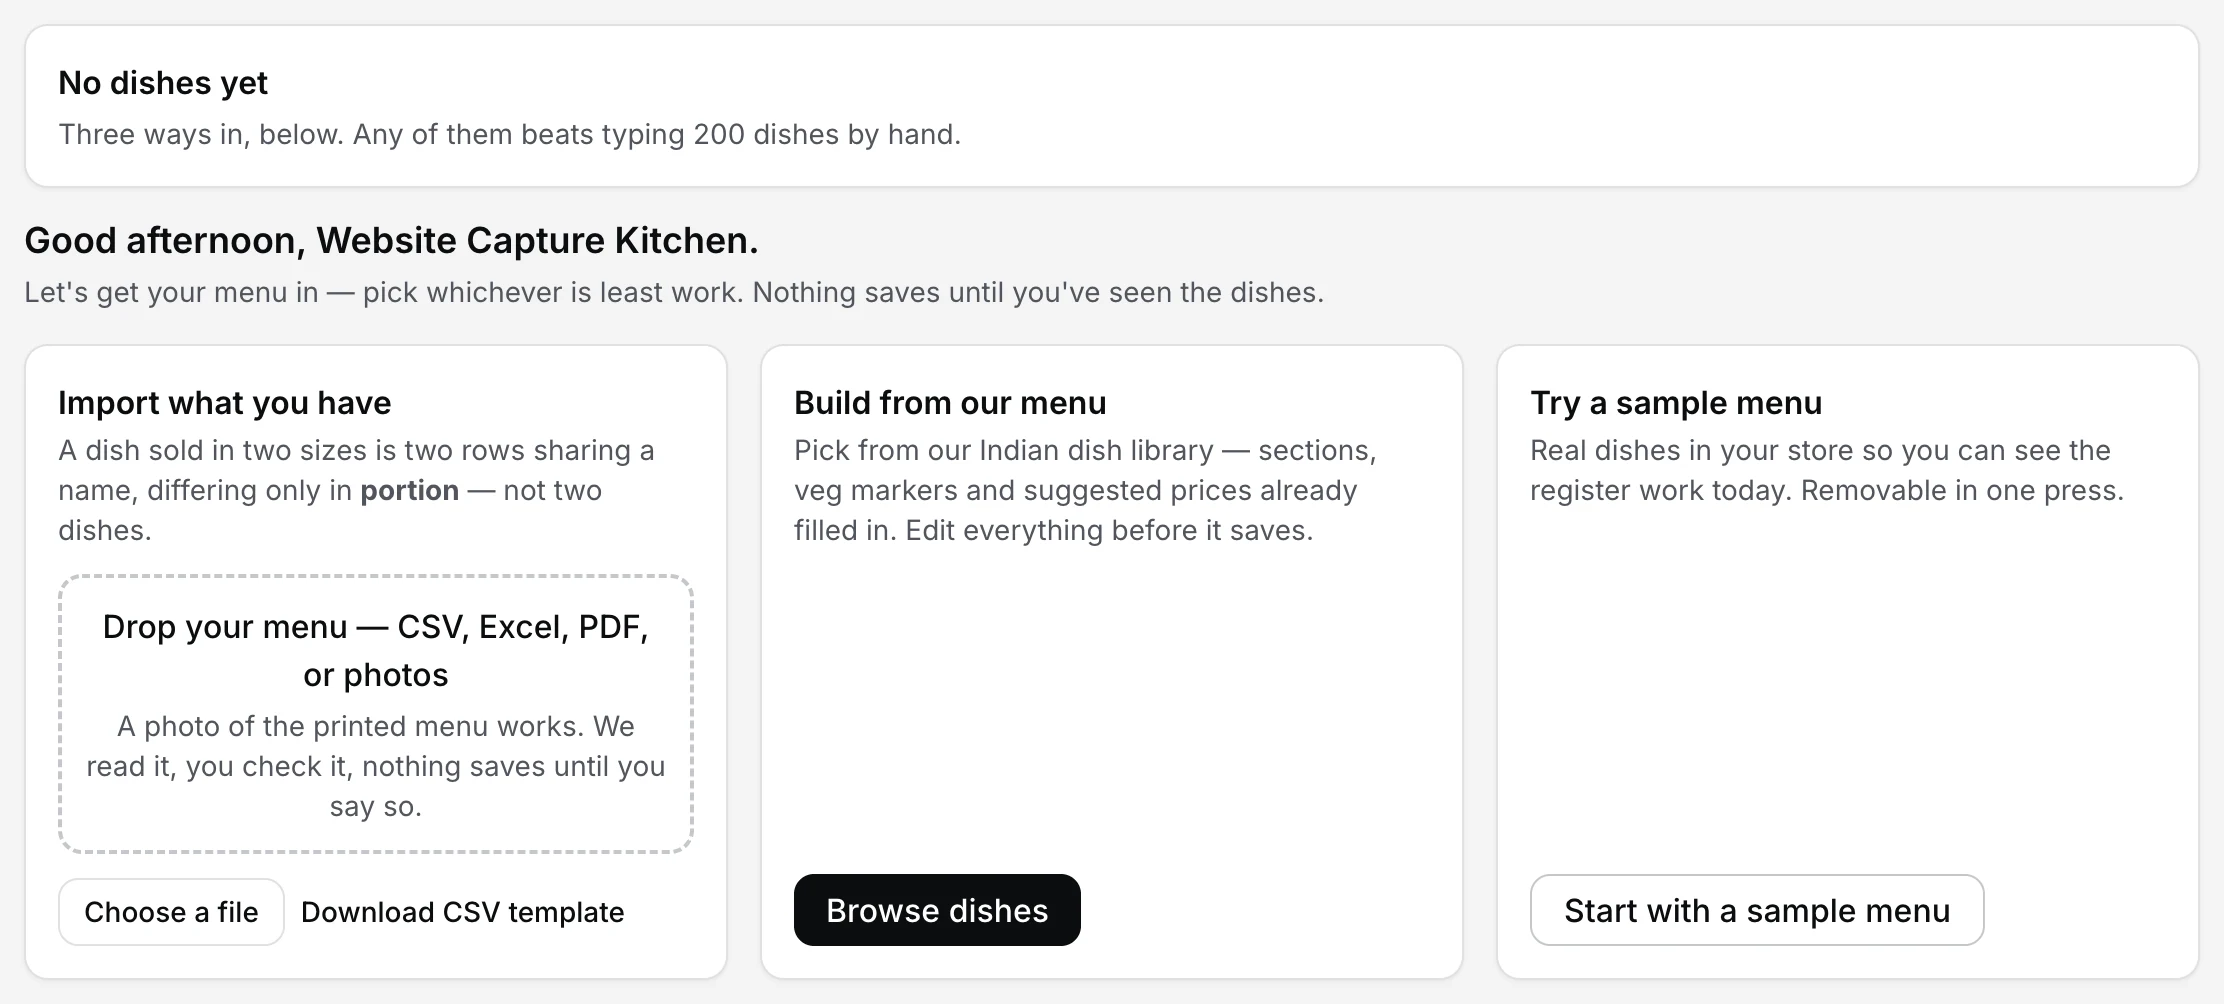
Step 1 — three doors, one editable menu at the end of each.
Drop the menu and let it read
Up to eight photos of your physical menu, or one PDF or spreadsheet. The progress line tells you what is actually happening — Reading your menu, Double-checking dishes and prices, Running final checks — and a spreadsheet is parsed right in your browser without uploading at all. Dishes that come in as Half/Full fold into one dish with portions, not two.
Check the review grid — nothing saves until you say so
Every dish lands in an editable table: name, category, portion, price, veg or non-veg. Rows the reader wasn't sure about wear a flag — a red flag blocks the import until you fix the row, an amber one just asks for a glance. Edit anything in place, delete what's wrong, then press 'Import N dishes'. Until that press, your menu hasn't changed by one paisa.
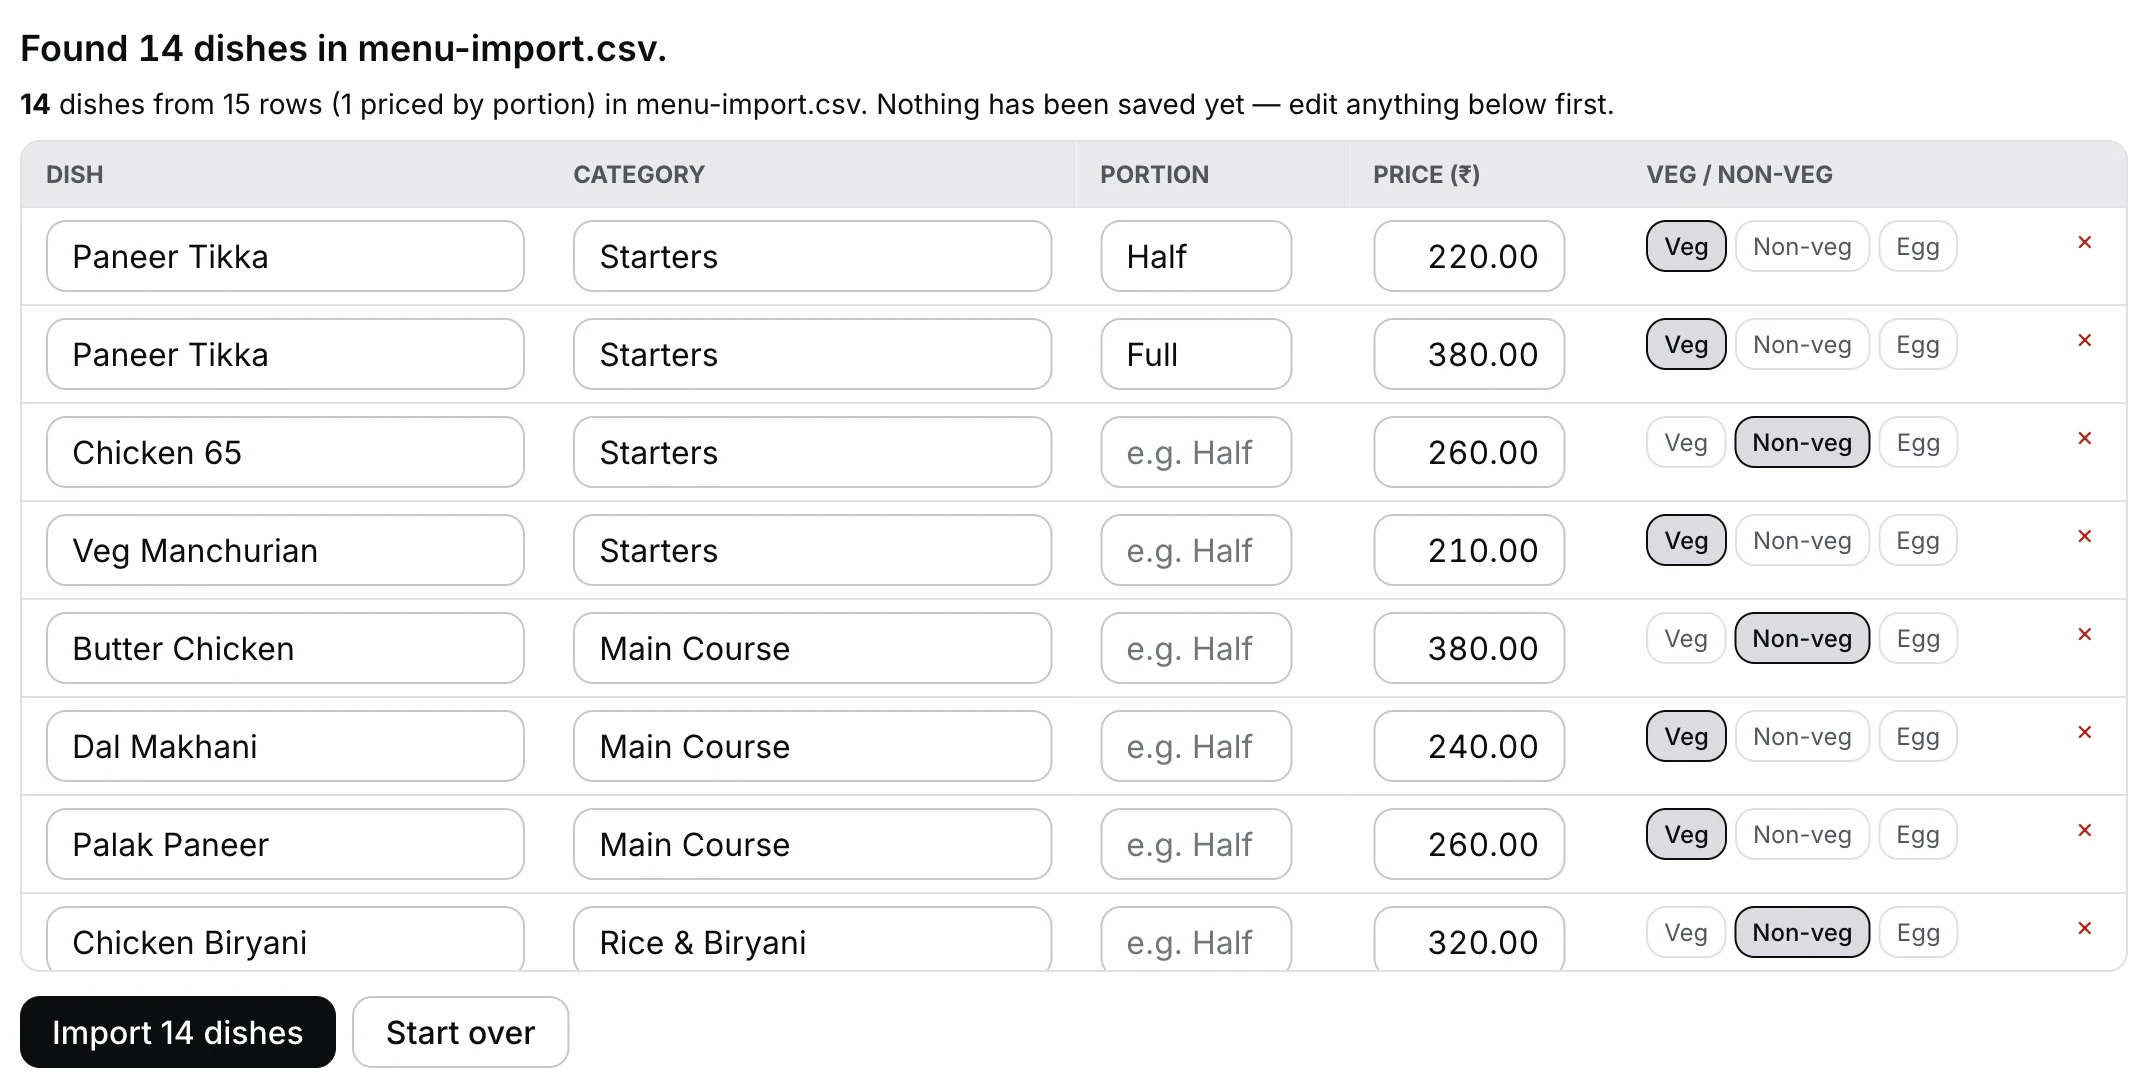
Step 3 — the AI types, you check: nothing saves until 'Import N dishes'.
Finish the details, then run the till from the till
After import, open any dish to set what a photo can't carry: the GST slab (with a live price-including-tax preview), add-on groups like extra cheese, variants, a description. Day to day, the register's own 'Menu stock & pins' screen handles the kitchen reality — flip a dish off when it runs out and its tile greys on every till, pin the counter's favourites to the top. Works offline, syncs everywhere.
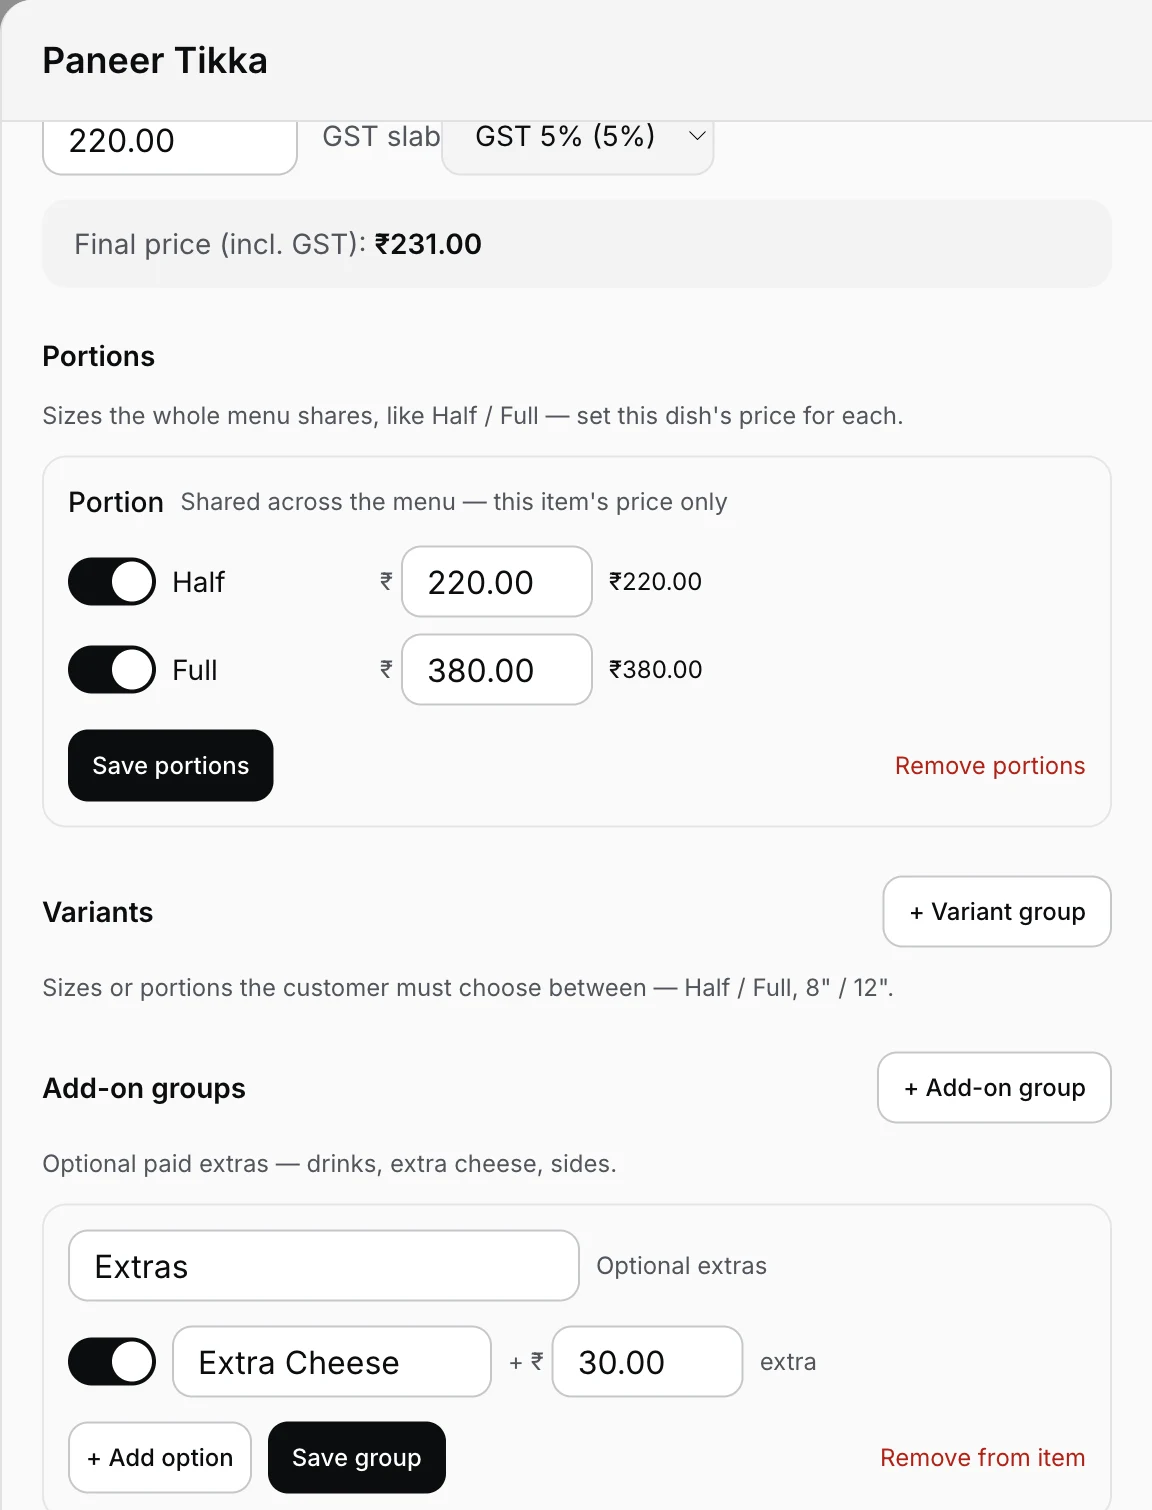
Step 4a — the details a photo can't carry: GST slab, portions, add-ons.
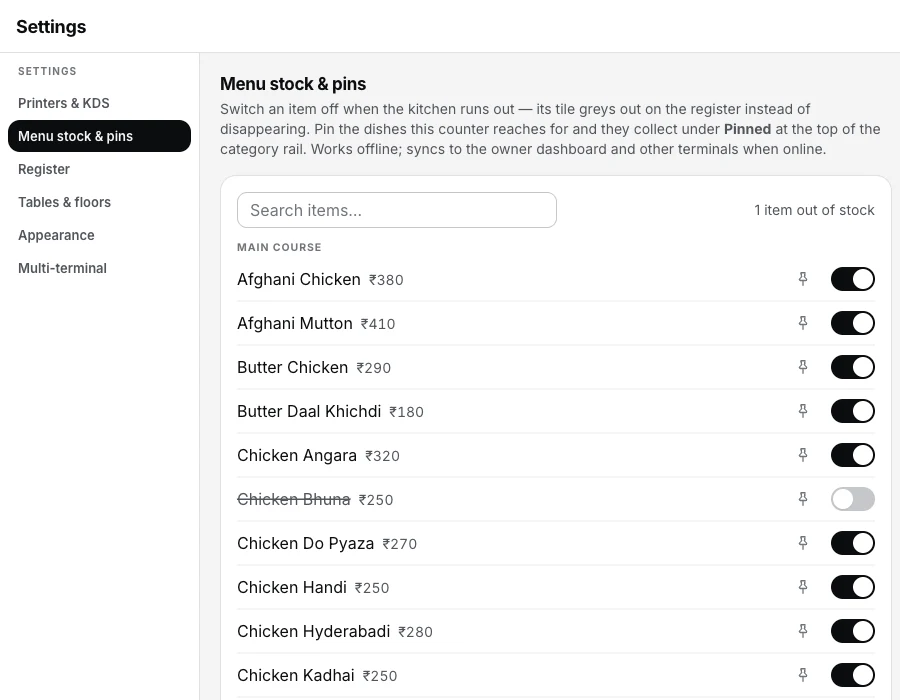
Step 4b — 86 a dish from the till itself; its tile greys on every terminal.
One pass the import can't do for you: GST slabs. The reader never guesses your tax registration, so imported dishes arrive without a slab — do the one-column pass in the item editor before the first real bill, on your CA's advice. The first-GST-bill guide shows where it lands on the paper.
Straight answers.
AI galat price daal de toh?
What files can I import from?
Does the import set my GST slabs too?
How do portions like Half/Full work?
How do I mark a dish sold out during service?
I changed the menu in the dashboard — when does the till see it?
With the menu in.
Your first GST bill
The four steps from the freshly imported menu to a printed tax invoice.
Make the first bill →Draw your floor plan
Tables where they really stand — the other half of setup day.
Build the floor →Menu management, in full
Categories, pricing, images, stock-outs — the feature tour of the dashboard side.
See menu management →Every guide in this cluster is listed on the guides hub.
3 mahine chalao, phir paisa lagao.
Three months free, full product, no card. Made in India, for the counter — built inside a running restaurant.